|
The last couple weeks in game design we started working with rigging and animation. The first couple of units we worked with just animation and relearning a bit of the basics. Personally, I believe that animation is one of the most fun things you can do while 3D modeling. The first couple of activities were just matching different definitions to the different words. The first actual assignment that I started working on is where I have to animate a ball bouncing across a room and interacting with six different objects in a room. I learned how to animate realistic bounces with the curve editor and how to make correct spin on it as well. In my room I put a table, a chair, and bench looking thing, a clockish thing, a painting, and a lamp thing. I think that I made it look halfway decent at least, and I made good use of each object in the scene so that the ball bounced off of everything at least once and had kind of realistic bounces. Since I am now done with this assignment, I can move onto the basics of rigging which is supposed to be the absolute hardest unit of the year. I only have two weeks to complete a whole ton of assignments and projects so I need to work nonstop from here on out.
I researched tips to help you rig better in 3DS Max and it basically talked about how you need to ask yourself what the purpose of the character is and what the character is going to do. You must also be precise with your work and organize your nodes properly as well. Things I learned:
0 Comments
All of last week we had to rush through the lighting unit in only five days. Since I was out on Wednesday I only had four days to do everything plus a quiz and didn't get through about three assignments. Lighting itself is actually pretty simple to learn because there are only six different types of lights that we are working with at the moment. The six different types of lighting we are doing is free spotlight, target spotlight, free direct, target direct, skylight, and omni lighting. Basically my week started with me getting about eight assignments that we have to do in five days and the first assignment took me the entire day to do so I was pretty stressed out, but the next day I got two more assignments done so I was happy. The first assignment that I had to do was I had to find six different photos that went with each of the lighting types and explain how they represented that type of lighting and how they improved the scene. The next two assignments that I had to do was create a desk lamp where I created a table and then make the lamp base and the lamp shade as well. Then we put a light inside the lamp to mimic a lamp light, then we also have to add two more lights to light the rest of the scene. For the light inside of the lamp I used a free spotlight, then to light the rest of the scene I used two omni lights, one to cast a shadow and another to kind of light the back of the lamp. The next assignment was where I had to create a mini stage and put two things onto the stage then create different spotlights for each other of the items to make the shadows look cool and different. What I decided to do was make one of the shadows a soft red color and the other one a soft blue color so that there was a lot of contrast between the two. All in all, lighting hasn't been too difficult but the small time limit has made it extremely difficult to get everything in on time and I am definitely going to have to go for tutoring to get the rest of the assignments done.
Recently we began learning about UVW mapping which is where you can apply a bitmap onto an object, but you can unwrap the texture as well and edit it however you please and wrap it back onto the object. The first assignment we got with this was where we had to start out by following a tutorial in texturing a box that was something like you would find in a video game. Basically we made six different materials (one for each side of the box) and put those six materials onto a multi-sub object material and put that onto the box. You put the bitmaps for each side onto the corresponding side of the box and it starts to look like a box. Some of the faces might not be facing the right way so you have to go to the material editor and change some of the values for the U, V, or W. In the end it looked like this: 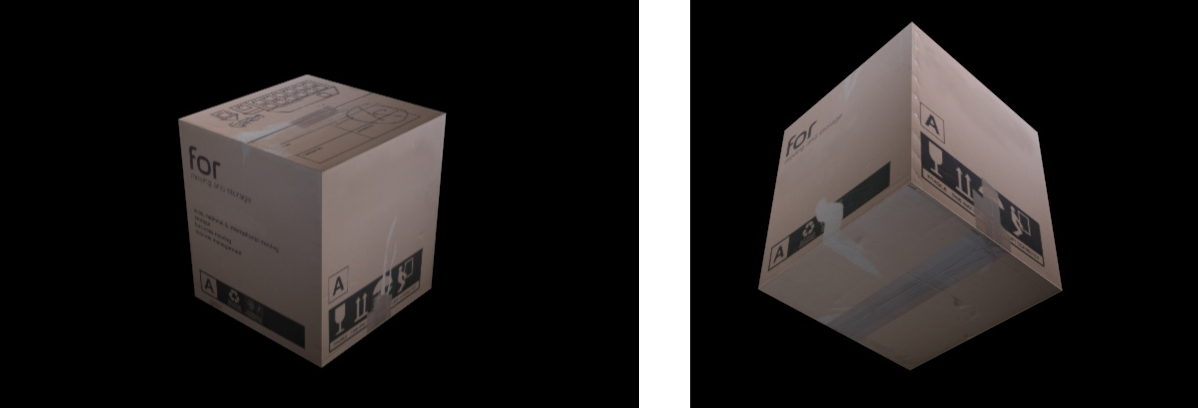 This part of the assignment wasn't very hard because it was just following a tutorial, but the next part was the tricky one. We had to find a box from Mr. B and take pictures of it on each of the six sides. You would then put each of the pictures into Photoshop and crop them so that only the box was showing. After that, all I had to do was do what the tutorial taught me to do and put it onto the box and make it look like the real thing. After all was said and done it looked like this: 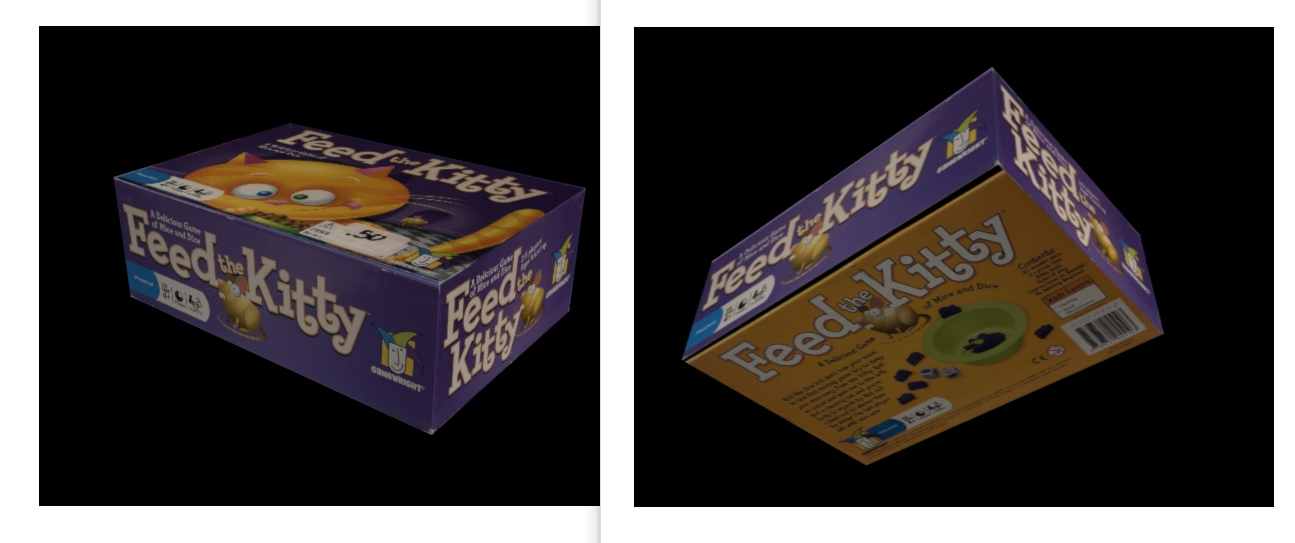 This week for our blog post we were assigned to watch a movie that originated from a video game. Most movies that fit that category were from video games I had never played before like Resident Evil and Mortal Kombat, so one of the only ones I could find was The Angry Birds Movie. The Angry Birds Movie overall wasn't really the worst thing ever to watch but I'm still just confused on why they decided to make it in the first place and why they're deciding to make a second one. Since Angry Birds, the game, is such a simple concept, making a movie about it will definitely have to sway from the original material a little bit. The movie is basically all about the pigs coming to Bird Island and stealing the bird's eggs from the birds and how they have to go save them. In the game you have to save the eggs from the pigs by using a slingshot to hurl yourself at them and basically kamikaze piloting them. In the movie they use a slingshot in one scene to go over the walls of the pig's base and into the building to save the eggs and at the end of the day the good guys win. All in all this movie is just like pointless to me because when this movie came out, the whole Angry Birds phase was already over and gone for like a year and now there's a second one coming out in 2019 and I really don't know what they can even expand on with that one. Excellent Movie: 10/10.
This weekend I was tasked with finding a professional 3D modeler who specializes in 3DS Max, which is surprisingly difficult since most professionals use Maya instead of 3DS Max. But eventually I came across Wagner de Souza, who lives and works in Brazil. Here's one of his works and his portfolio below: 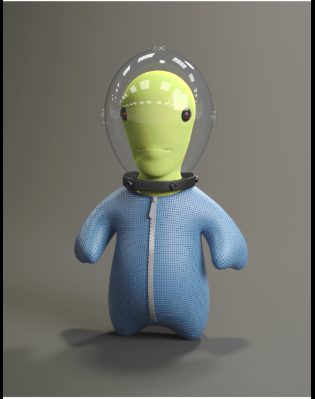 I think the thing I like most about his work is that it isn't super realistic and it looks like he has to have fun with most of his work and I like that level of artistic expression and it's something I would like to replicate. A plan for how I can improve my modeling is first I can try to find a modeling style that I like and that makes modeling more fun for me instead of just following tutorials the whole time. The second step is to start modeling things outside of class and just experimenting more and challenging myself to make things I couldn't before. I can use the tools we start to learn in class in my out of class work to further my learning and skills. 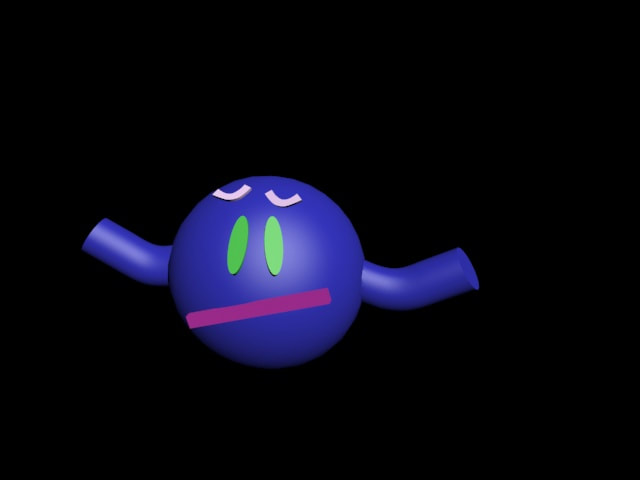 Since, you know I'm not the best at modeling, this nervous looking dude is my model. I tried to go for a silly lookin' thing and not go for a human character and more of a cartoonish character. I could go more in depth for the design and make it look a lot better if I had more time and a little guidance, but by myself, this is the best I got.
In summary:
This week in class Mr. B assigned us to plan out and draw 20 logos for a made up company called "BlackBurn Diner". In my class I think I was the first one to finish the assignment before this so I went ahead and started designing some logos and brainstorming my ideas. After two days in class I had only 13 logos made and I was a little upset that I didn't have more after all this time. I went and asked my friends for some ideas and they gave me some really good ideas for how to make a good and well designed logo. So when I finished up the logos I asked Mr. B to check them and he chose his favorite three and two of them were my favorite ones so I was pretty happy with it. The next day I started making my logos in Illustrator and it was pretty fun improvising different ways to transfer my ideas to Illustrator.
https://thelogocompany.net/blog/logo-tutorials/adobe-illustrator-photoshop-logo-design/ Tuesday is class our assignment was to create piece of pizza. We had to create a single slice with pepperoni, green peppers, olives, and then make up our own ingredient. We started by making a triangle and then elongating it to create the shape of a pizza. Then we made a circle and chose the color of pepperoni slice from a color palette. Then we duplicated it and placed them on the pizza. To cut off the bits of pepperoni that weren't on the slice we selected everything and then used the shape builder tool to delete the sections that didn't fit on the pizza. After that we created our olives by making two circles, one slightly smaller than the other. We colored the larger one black and colored the smaller one white and put them on top of each other. Then use the shape builder tool to remove the white circle from the black circle and you created your olives you can place all around the pizza. After that we made the green peppers which were very simple to make. All you had to do was make a rectangle and color it green and then duplicate them and put it on your pizza and boom you made it. After that, I made my own ingredient which was sausage. I did the same thing that I did for the pepperoni but I colored it grayish and then duplicated it like the rest if the ingredients. Finally, I made my crust by making a rectangle that was a little lighter than the original slice and then used the shape builder tool to erase the part that was coming off the pizza and then my pizza was done. I look forward to making more things in Adobe Illustrator as time goes on.
This week in class we covered color and how to use it. We learned about saturation, hue, value and also stuff about different color models like the additive (light) model and the subtractive (pigment) model. We learned about which colors made you feel which way like red is associated with power and passion, green is associated with nature and growth, and yellow is associated with happiness and joy. Our two assignments for this week were to take color blindness tests and write down what happened and where we struggled. The other assignment had us create a color wheel and answer questions about color. Our next assignment due next week is creating a video game poster with documents Mr. B gives us. It's our job to arrange them and color them with colors that mean something in Asia, Latin America, and the Middle East. In digital media, color is used very specifically, people don't just choose random colors they think look cool, they choose colors that mean something and they want to convey a message to you so think about that next time you see someone's art.
Source: http://www.color-wheel-pro.com/color-meaning.html For the last week in class we have been working on story boarding and making a comic. After the project Mr. B explained why story boarding is so important and how everyone can improve their story boards. If the story board is ambiguous then no one will know what you want to do and how you want the scene to look. Without a good story board there won't be a good game, movie, or whatever you are making. Story boarding is just one part of the pre-production stage in the production cycle. The pre-production stage also contains an orthographic view of your main character so that when the 3D modelers can make the character as detailed and accurate as possible. Then you make a storyboard for it and then you can move into production.
Graphic Design has always looked like a cool job, but I didn't know much about it going into freshman year. I always doodle in class ( even if they suck) and graphic design to me was just making doodles on a page that make it look good. People always tell you that high school is the place where you figure out what you're going to do in your life, and that's really stressful sometimes. So when I heard we would be researching careers in game design I thought about graphic design and decided that I was going to get a more in depth understanding on it. After my research I realized I was sort of right. Graphic Design is just making visual concepts that pull the viewers in. They have to do other stuff like talk with clients about what exactly to do, but the bulk of the job is the actual designing part. Apart from the project I also learned that it wasn't very cheap to have the right tools. It cost about $200 to have a good tablet to draw with, and you have to buy software like Adobe Photoshop. All in all graphic designing is a fun job for creative minds.
|
